About The Author
ANCHOR POINT ROOFING
Are you struggling with leaking or deteriorating shingles on your roof? You might be shocked to learn that the culprit could often be improper nail head placement. This guide will unlock all the secrets of how to nail shingles correctly – a key aspect often ignored in maintaining roof warranties and longevity.
Intrigued? Let’s dive right into it!
KEY TAKEAWAYS
- Properly nailing shingles is essential for optimal performance and longevity of your roof, preventing leaks and damage.
- Select the right roofing nails by considering size, material composition, and head type to ensure a successful installation.
- Evaluate the condition of the roof decking before installing shingles to ensure it is structurally sound without any rot or water damage.
- Position and drive roof nails correctly by placing them at the designated nail line on each shingle and avoiding overdriving or underdriving them.
- Follow manufacturer instructions and guidelines to avoid common mistakes and maintain warranty coverage.
THE IMPORTANCE OF PROPERLY NAILING SHINGLES

Properly nailing shingles is essential for optimal performance and longevity. It ensures that your roof can withstand high wind and harsh weather conditions without leaks or damage. By following the correct techniques, you can prevent improper driving and placement of nails, ensuring a secure and durable roof.
ENSURING OPTIMAL PERFORMANCE AND LONGEVITY
Nailing your shingles properly is a direct ticket to the longevity of your roof. By strictly adhering to the manufacturer’s guidelines throughout the installation process, you increase the chance for optimal performance and extended life span of your roofing system.
Key benefits such as prevention of early wear and tear and reduction in frequent maintenance costs often hinge on this crucial step. A properly nailed shingle keeps a tight seal, making it resilient against harsh elements like wind, rain, or snow, which could shorten its serviceable life.
Nailing precision contributes significantly to maintaining warranty coverage over time— a vital aspect for homeowners seeking lasting solutions with minimal hassles.
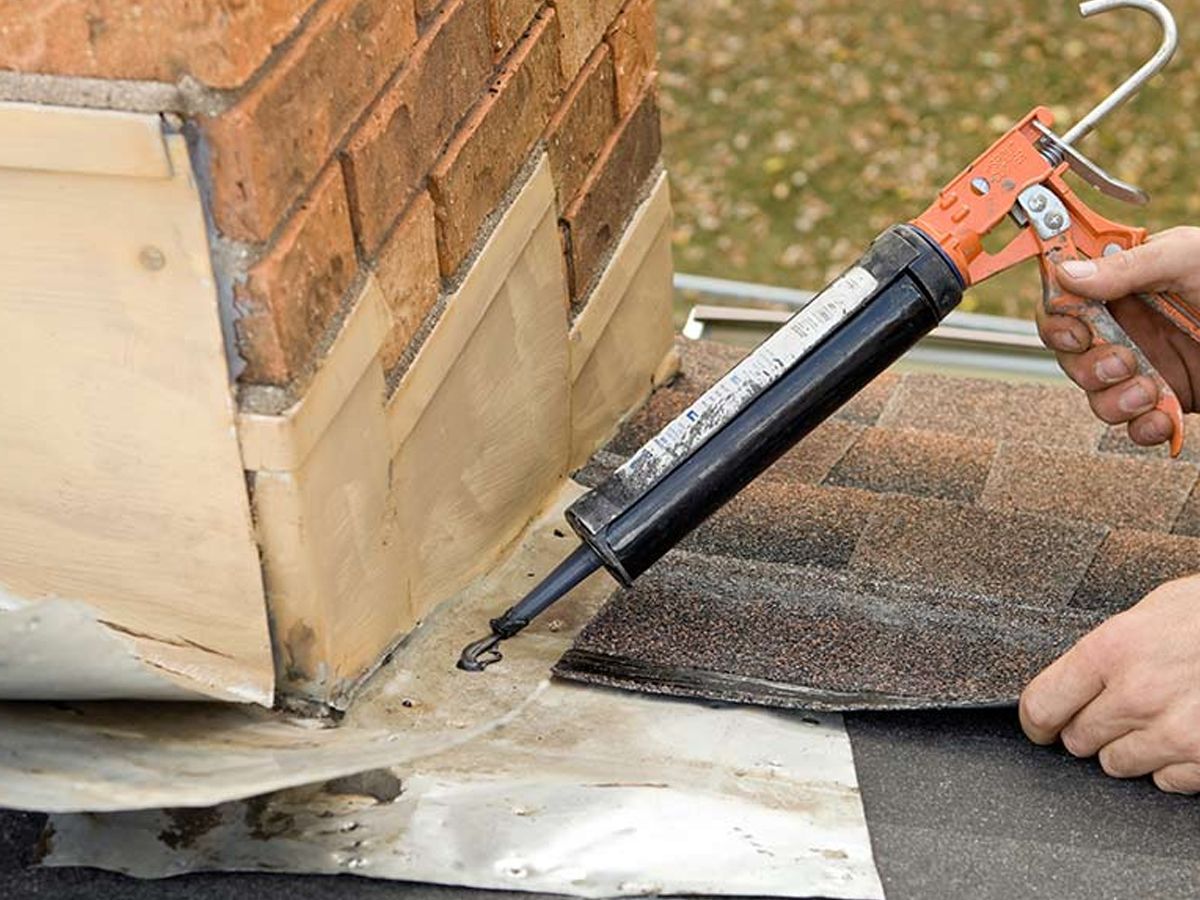
PREVENTING LEAKS AND DAMAGE
Proper nailing of roof shingles is a key factor in preventing leaks and damage, ensuring the durability of your roofing system. Incorrect or insufficient nailing can lead to shingle loss during high winds or create spaces for water infiltration, triggering leaks.
Regular roof inspection helps identify improperly installed shingles before they pose severe issues like water damage to your home interior. Not just this, timely repairs by a reputable roofing contractor ensure that faulty installation doesn’t void warranty coverage manufacturers offer on their roofing material.
By adopting accurate installation techniques, you ensure the longevity and reliability of your new roof while keeping those unwanted leaky rainy days at bay.
STEPS TO PROPERLY NAIL SHINGLES
- Select the right roof nails.
- Evaluate the condition of the roof decking.
- Position and drive nails correctly.
- Prevent crooked or overdriven nails.
SELECTING THE RIGHT ROOFING NAILS
Picking the right roofing nails is essential to ensure a successful and long-lasting shingle installation. Crucial factors include nail size, material composition, and head type.
Roofing nails typically range from 1″ to 2″ in length; however, base your selection on the thickness of your roofing materials for proper penetration into the roof deck. Material-wise, choose either galvanized steel or aluminum to resist rust and corrosion over time.
Finally, select nails with large, flat heads that provide ample surface area for securing shingles without tearing them — an integral part of maintaining your warranties and avoiding future repairs.
EVALUATING THE CONDITION OF THE ROOF DECKING

Assessing the condition of your roof decking is an important step in properly nailing shingles. The decking provides the foundation for your shingles and must be structurally sound to ensure a successful installation.
Start by checking for any signs of rot or water damage, as this can weaken the decking and compromise the integrity of your roof. Look out for sagging or uneven areas, which may indicate underlying issues that need to be addressed before proceeding with the installation.
It’s also essential to make sure that there are no loose boards or protruding nails that could affect the shingle’s ability to lie flat. Taking the time to evaluate and address any concerns with your roof decking will help you achieve a durable and long-lasting shingle installation.
POSITIONING AND DRIVING NAILS CORRECTLY
Properly positioning and driving roofing nails when installing shingles on your roof ensures a secure and long-lasting result. The first step is selecting the right roofing nails appropriate for the type of shingles used.
It’s important to evaluate the condition of the roof decking before installation, ensuring it is in good shape and free from any damage or rot.
When positioning the nails, they should be placed at the designated nail line on each shingle, which varies depending on the specific type of shingle being installed. Care should be taken to drive nail heads straight into the decking, avoiding over or underdriven nails.
PREVENTING IMPROPER DRIVING AND PLACEMENT OF NAILS
To ensure the proper installation of shingles on your roof, avoiding improper driving and placement of nails is crucial. This step is essential for maintaining the integrity and longevity of your roof.
When choosing roofing nails, opt for ones specifically designed for this purpose. Before you start nailing, evaluate the condition of the roof decking to identify any weak spots that may require reinforcement.
Position each nail correctly by placing it approximately 1 inch above the cutout area of the shingle while ensuring they are driven straight and flush with the surface. Avoid overdriving or underdriving nails, as both can cause damage to the shingles and compromise their effectiveness in protecting your roof from leaks and other issues.
TIPS FOR A SUCCESSFUL DIY SHINGLE INSTALLATION

Ensure a successful DIY shingle installation by using the right tools and materials. Follow manufacturer instructions and guidelines to avoid common mistakes. Properly nailing shingles is crucial for a long-lasting roof.
Learn more about positioning, driving nails correctly, and preventing improper placement to achieve optimal performance.
USING THE RIGHT TOOLS AND MATERIALS
To ensure a successful DIY shingle installation, it’s crucial to use the right tools and materials. The proper tools will not only make the job easier but also ensure that you achieve professional-looking results.
Start with a good-quality hammer if you are hand nailing. Or use a pneumatic nailer or roofing nail gun, to fasten shingles securely into place. Additionally, invest in a sturdy ladder or scaffolding system to safely reach your roof without compromising your balance.
Don’t forget about equipment like gloves, goggles, and knee pads to protect yourself during the process. When it comes to materials, opt for high-quality shingles that are suitable for your specific climate and roofing needs.
WHAT TO LOOK FOR IN A ROOFING CONTRACTOR
To ensure a successful DIY shingle installation, it is crucial to carefully follow the manufacturer’s instructions and guidelines. These instructions provide valuable information on the proper techniques and requirements for installing the shingles.
By adhering to these guidelines, you can avoid common mistakes and prevent potential issues down the road.
Manufacturers often specify important details like the type of nails to use, the correct positioning of each shingle, and any specific tools or materials that are recommended. Following these instructions will not only help you achieve a neat and professional-looking roof but also ensure that your warranty remains valid.
GO THE EXTRA MILE FOR YOUR HOME
Proper nail placement is crucial for a successful shingle installation on your roof. By following the steps outlined in this DIY guide, you can ensure optimal performance and longevity for your roof. With these tips in mind, you can confidently tackle your roofing project while maintaining warranty coverage.
When you want to make sure your roof is repaired correctly, look for experienced professionals to do the job for you. For high quality roofing service in the Metro Chicago area, choose the Anchor Point Roofing team. Contact us today for a no-obligation estimate.
Share this article :
RECENT ARTICLES